How to Check Your Anode Rod: Water Heater Annual Maintenance
Water heaters are often the unsung heroes of our homes, providing hot water for everything from showers to cleaning dishes. But when a water heater fails, it can cause major headaches. From the nightmare of coming home after a vacation to find your basement flooded with water to the more extreme stories of water heaters turning into pressurized rockets, water heater failures can be expensive and damaging. Fortunately, many of these problems are preventable, and proper maintenance is the key to avoiding such disasters.
One of the most critical maintenance tasks you can perform on your water heater is checking the anode rod—the sacrificial metal rod that helps protect your tank from corrosion. In this guide, we’ll show you how to check and maintain your anode rod to ensure your water heater operates efficiently and lasts as long as possible.
Why the Anode Rod Is Crucial for Your Water Heater’s Health
Your water heater is made of steel and lined with a vitreous glass lining, which can corrode over time if exposed to the minerals and chemicals in your water supply. The anode rod, usually made of magnesium, aluminum, or zinc, is designed to prevent this corrosion. It works by attracting the corrosive elements in the water, causing them to corrode before your water heater’s tank does.
The anode rod essentially sacrifices itself for the good of the tank—hence the term “sacrificial anode.” As the rod wears down, it must be checked and replaced regularly to prevent your tank from rusting and failing prematurely.
When to Check the Anode Rod
To keep your water heater functioning optimally, you should check the anode rod every 1-3 years, depending on the water quality in your area and how frequently your water heater is used. If you have hard water, you may need to check it more often, as mineral buildup can shorten the life of the rod.
Additionally, you should be on the lookout for signs that your anode rod may need attention, such as:
- Foul-smelling hot water: A rotten egg or sulfur odor could indicate bacteria buildup around the rod.
- Rusty or discolored water: If you notice rusty water coming from your taps, it might be due to a deteriorating anode rod.
- Noise from the tank: Popping or rumbling sounds could mean sediment buildup caused by an insufficient anode rod.
Step-by-Step Guide: How to Check Your Anode Rod
If you feel confident tackling this maintenance task yourself, follow these steps to check and, if necessary, replace the anode rod in your water heater.
1. Turn Off the Power and Water Supply
Before you do any work on your water heater, make sure you take the proper safety precautions:
- For an electric water heater: Turn off the power at the breaker to prevent the risk of electrocution.
- For a gas water heater: Turn off the gas supply and ensure the pilot light is extinguished.
- Close the cold water inlet valve to stop the flow of water into the tank.
- To relieve pressure inside the tank, turn on a hot water faucet in your house (water will not come out, but this will help drain the pressure).
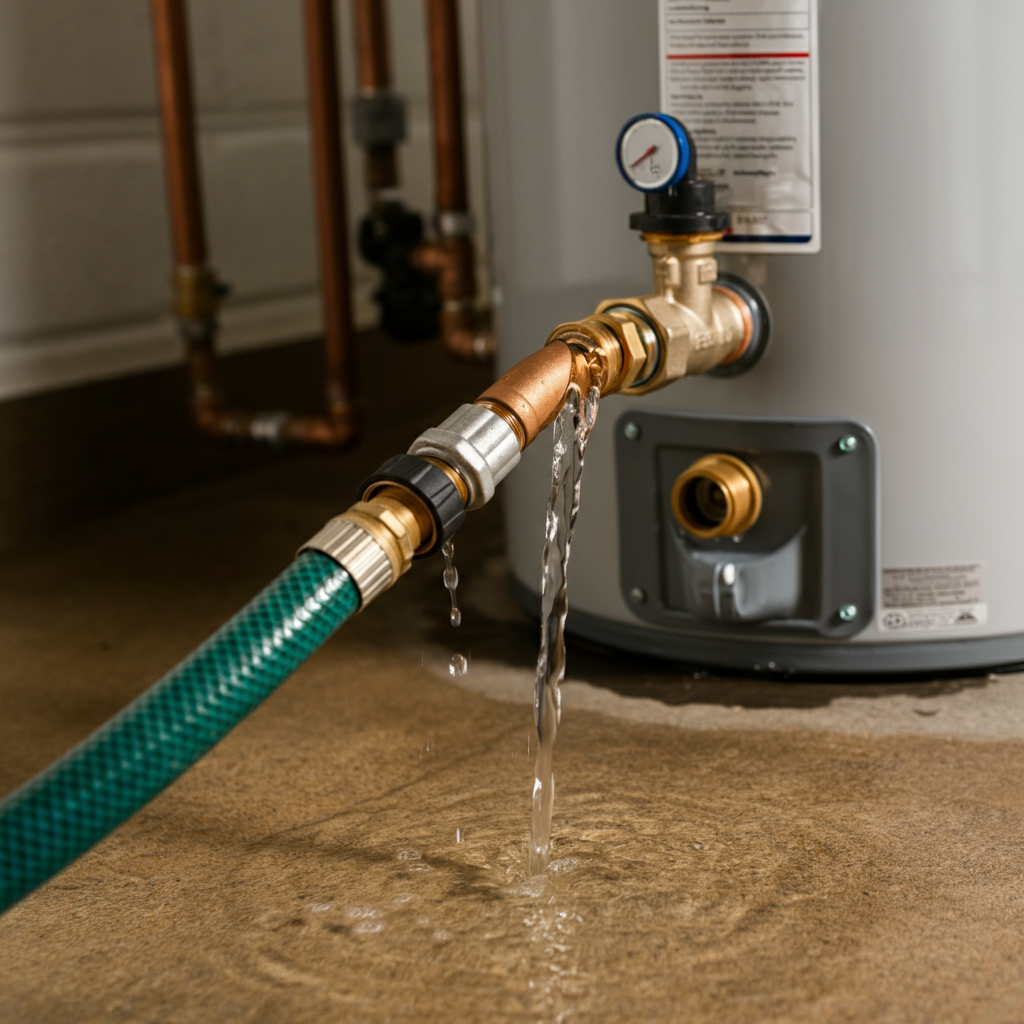
2. Drain a Small Amount of Water from the Tank
To make space for checking the anode rod, you’ll need to drain some water from your heater. Attach a garden hose to the drain valve at the bottom of the water heater and direct it to a safe drainage area. Open the valve and allow 5-10 gallons of water to drain from the tank.
3. Locate the Anode Rod
Next, go to the top of your water heater to locate the anode rod. Most water heaters have a hex head bolt that holds the rod in place. If you don’t immediately see the bolt, you may need to remove a plastic cap with a flathead screwdriver. If your unit has a built-in anode rod (common in some models), you’ll need a professional plumber to inspect or replace it.
Once you find the anode rod, you can begin to unscrew it.
4. Remove the Anode Rod
Using a 1 1/16-inch socket, unscrew the anode rod from the top of the tank. Keep in mind that it might be tight due to mineral buildup, so you may need to apply a bit of force. Be cautious—the rod will likely be hot. If it’s hard to remove due to clearance issues above the tank, you might need to cut the rod into smaller sections.
5. Inspect the Anode Rod
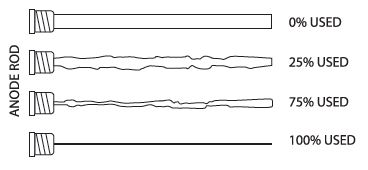
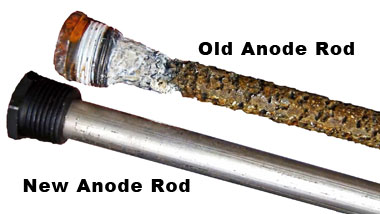
After removing the rod, it’s time to inspect it. Here’s what to look for:
- Corrosion or thinning: If the rod has corroded down to less than ½ inch thick, it’s time to replace it.
- Calcium buildup: If the rod is coated with calcium or other minerals, it should be replaced to ensure it can still work effectively.
- Completely used up: If there’s no more rod left, and just the steel wire is visible, it needs to be replaced immediately.
6. Replace the Anode Rod (If Needed)
If the anode rod is damaged or worn out, you’ll need to replace it. You can purchase a replacement rod at your local hardware store, typically costing between $30-$60. If headroom is limited above the tank, you may need to buy a segmented, flexible rod that can be bent to fit.
To install the new anode rod:
- Wrap Teflon tape around the threads of the rod to ensure a tight seal.
- Screw the new rod into place and tighten it securely. Be careful not to overtighten, as this could damage the threads or the tank.
7. Check for Leaks
After replacing the anode rod, turn the water supply back on and refill the tank. Check for leaks around the new rod for the next 24 hours. If you detect any leaks, tighten the rod or add more Teflon tape to improve the seal.
8. Turn on the Power or Gas
Once everything is secure and no leaks are present, turn the power back on for electric heaters or the gas supply back on for gas heaters. Check the water temperature and ensure everything is functioning properly.
When to Call a Professional at Penguin
If you don’t feel comfortable performing these tasks yourself or run into any difficulties, don’t hesitate to call a professional plumber at Penguin. They can inspect and replace the anode rod quickly and safely, ensuring your water heater operates efficiently.
Schedule Water Heater Services With Penguin Today
Replacing the anode rod is essential for maintaining your water heater, preventing corrosion, and extending its lifespan. Regular inspection and replacement as part of annual maintenance can help avoid costly repairs and keep your home in a steady supply of hot water.
If you ever feel unsure or need professional assistance, don’t hesitate to contact a Penguin for all your plumbing needs. Keeping your water heater in top condition today will help avoid expensive repairs tomorrow!
We Are Here for You!
Win With Penguin
Discover the Penguin Difference
Superior Customer Service
100% Satisfaction Guarantee
24/7 Emergency Service
One Stop Shop for All Your Home Service Needs
Upfront Pricing
Locally Owned & Operated
All Technicians Background Checked & Certified
Lifetime Warranties